Image Map

Tuesday, August 28, 2012

Family Week of Fun

Although many of you are already back in school, this is our official last week of summer before school starts. My sweet husband decided to take the week off to spend time with me and the kids. He calls it our "Family Week of Fun." He has planned a list of activities for us to do including, camping, amusement and water parks, and a weekend away to one our favorite local getaways. Blogging will most likely take a back seat to our week of fun, but I promise to be back in a few days with some client updates as well as some more progress shots of spaces in my new home!

I hope you are all having a fantastic week!


Thursday, August 23, 2012

DIY Window Cornice

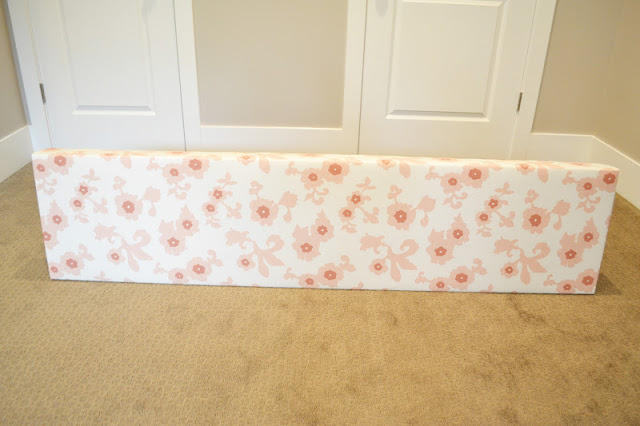
Today I am excited to reveal the window cornice, which my hubby and I made for Miss M's new room, this past weekend! I knew that I wanted to dress up the window in her room, but I didn't want to spend a fortune to do it. Last year, I scored this Serena & Lily fabric on a clearance sale for $6.50 a yard! Ah-mazing! The fabric is fantastic quality and I am in love with coral and blush tones in it. This fabric was regularly $50/yard! I ordered six yards of it, as I had originally intended to use if for full length drapes. As I began to design my daughter's room, I decided that I wanted to incorporate some of the fabric into her bedding as well. If I used all 6 yards for the drapes, I wouldn't have any leftover to do that, so I decided to make a window cornice instead, which left me with plenty of fabric to use in other projects. The window will still get drapes, which will sit under the cornice, but they will be a solid fabric with a trim treatment on the edges.

This a fun, inexpensive and fairly easy project that took us just a couple of hours to complete. Here is the run down of how we did it..

My hubs and I measured out the dimensions of the cornice and headed to Home Depot to purchase a sheet of MDF. We purchased a sheet of 1/2" MDF for $14.00 and then had the wonderful people at Home Depot cut it for us right in the store. My daughter's window is 59" wide and I wanted a 5" overhang on each side. I also knew that I wanted the cornice to be 16" tall, so we had them cut a 69" x 16" piece. I then determined that the proper depth for the cornice was 4" from the wall. Since the MDF is 1/2" thick, I had the people at Home Depot cut me two 3 1/2" x 16" pieces (for the sides) and one 69" x 3 1/2" piece (for the top). It was so great not having to do any of the cutting ourselves...BONUS!

The hubs then took all of the pieces and assembled them together with screws and L Brackets.
 He placed the side and top pieces on top of the face piece, not next to it.
 I then sprayed the cornice with spray adhesive and covered it with a thin quilt batting which I purchased from Hobby Lobby.
 It looked like a hot mess from the back, but nobody is going to see that anyway. :)
 After the adhesive was dry, hubby took the cornice inside and secured the fabric to it, by wrapping the fabric and stapling it with a staple gun to the inside.
 For the corners, I just folded the fabric like I was wrapping a gift to create a nice, clean, straight line.
Again, a mess from the back when it was done, but...
Pretty good looking from the front!
I knew that the cornice needed to be jazzed up a bit, and since I have a slight obsession with nailhead trim, it was the perfect solution! I purchased this 5 yd roll of nickel nailhead trim from Hancock Fabrics for $12.00.
My hubs simply nailed it in using a hammer! (I realized that it doesn't look like I am doing much work on this project, but I promise I helped every step of the way!) :)
The finished product!


 The cornice was attached to the wall, once again, using L Brackets which were secured first to the wall, and then to the top piece of the window cornice.

I think it turned out beautifully, and the whole project cost me roughly $55.00, including the fabric!

Like I mentioned before, I will still add full length drapes to complete the look I am going after. Miss M's Room is coming along nicely and I am hoping to have it completed in the next couple of weeks. I am so excited to share it with you! Until then, here is a little peak at a few of the elements already in her room..


She is loving her room so far and that is what matters most!

Monday, August 20, 2012

What's Goin' On?

Happy Monday everyone! How many of you sang the title of my post to yourselves as you read it? If you did, did you hear it in your head with your own voice or with Marvin Gaye's voice, like I did? Ok, clearly, I am easily entertained. :)

Anyway, I thought I would update you on what's going on in my design life lately. First, some "Before" shots of a few local client projects I am currently working on...

I get to makeover this kitchen and design the family room space for a dear friend, whose family just moved into a new home.


This entry design project is nearing completion. We are just waiting for some products to arrive. I hope to do the install and finish up the project in the next couple of weeks. I am super excited to share it with you!


I am just getting started on this Master Bedroom makeover as well. This project is a complete collaboration between the homeowner and I. She is a talented seamstress who will be sewing all of the pillows, drapery and even the bedding for the space! What I wouldn't give to have skills like that!


Also on the list are two family room designs...


The sectional sofa in both of these spaces will be staying, and I am excited to show all of you "brown leather sofa" phobes out there just how fabulous a space can look with one in it!

There are also a couple of other projects in the works that I look forward to sharing with you. The design process takes time, and I want to also have these spaces professionally photographed before I share them with you. So I hope you will stick with me. I promise to give you progress updates along the way! Hopefully you will think that the finished room reveals were worth the wait!

Also, I have to express my gratitude to all of my wonderful clients and blog readers. When I started this journey less than a year ago, I had no idea where it would take me. I have been immeasurably blessed by the people I have met and the opportunities I have been given through the world of blogging. The fact that you allow me into your homes, or spend a moment of your day, here, with me, is humbling and incredibly uplifting at the same time. Although life has become busier, and I am still trying to figure out how to manage it all, I would not change any of it. I get to do what I love because of my clients, and you, my blog readers. That is an amazing gift you have given me and I thank you, from the deepest space in my heart.

Oh, one more thing...
I'm still flexing my weak  DIY design muscle, as I decorate spaces in my new home. Here is a little glimpse of what my hubs and I worked on this weekend for Miss M's room...


Details and a reveal of this little project to follow on my next post!


Thursday, August 16, 2012

A Masterful Modern Retreat

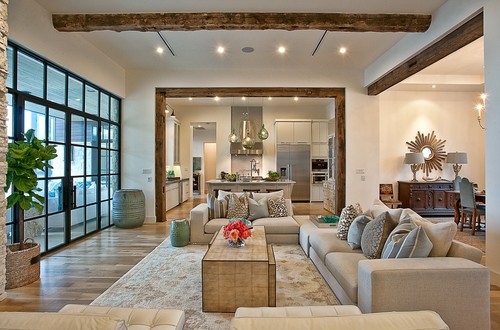
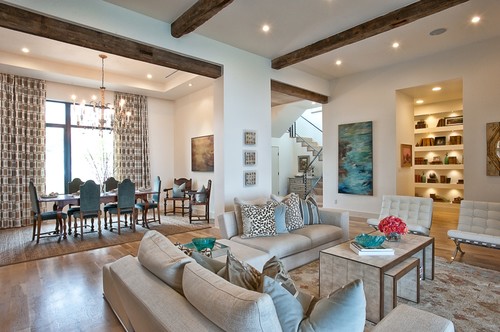
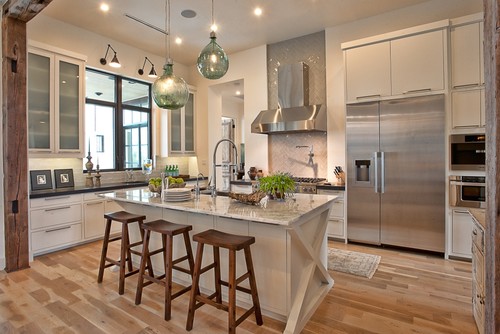
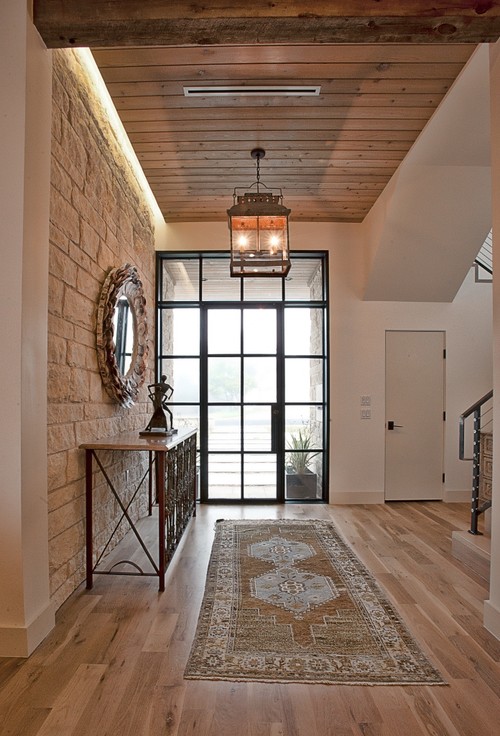
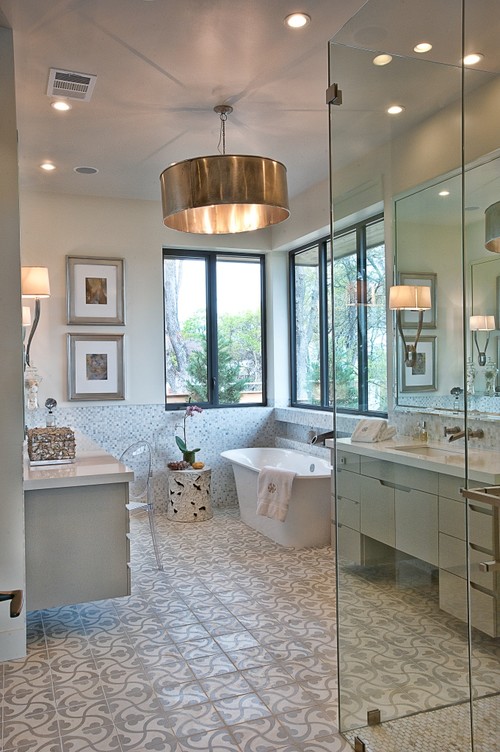
Although, my personal design style is not particularly modern, I can surly appreciate modern design and architecture for its' clean, simplistic beauty. When I came across photos of this home, built by Greenbelt Homes, out of Austin, TX, I immediately fell in love. The builder and designer of this home masterfully combined modern architecture, with rustic elements (check out the wood beams and casings) and then added the perfect mixture furnishings and decor to make this home a WOW! with warmth and elegance. This modern retreat is a dream home for sure, and I, for one, would be happy to move right in.


To see more pictures of this amazing home go here. Trust me, you don't want to miss seeing the rest of it!

Tuesday, August 14, 2012

Land of Nod Loveliness

I received the new Land of Nod catalog in the mail last week and I was pleasantly surprised by what I saw. There were so many fun and unique furniture and decor items on the pages. Land of Nod has long been a destination for outfitting Kids' Rooms, but many of the items in the new catalog could easily make their way into any room in a home.

Although this faux bois comforter is darling for a boy's room, with the right accent pillows and styling, it could be really fun in a guest room as well.

I love the lines of the Monarch Dresser.
 Just add this gold lamp is sure to glam up any space in your home.

How fun would this Aztec Rug be in a bright, welcoming entryway or a colorful kitchen?
Group four of these mirrors on a wall for an instant focal point.


Following the trend of other "Big Box" retailers, like IKEA and West Elm, Land of Nod has really stepped up its' game when it comes to their product offerings. What do you think? Would you shop Land of Nod for your own home?

Monday, August 13, 2012

Manic Monday

I hope everyone had a great weekend. I sure did, but I am spending the day today in recovery mode. Fun over the weekend makes for work during the week. I need four of me to get it all done...


Baking and cake decorating are not part of my to do list, but you get the point! :) Back to design blogging tomorrow!

Wednesday, August 8, 2012

My New Home: Kitchen

As promised, here are some pictures of my new kitchen. The kitchen was one of the things that drew me into this home. It is spacious, light, bright and just plain lovely. The Thermador cooktop and gigantic built in fridge are straight from my dreams. The microwave drawer in the island has also become a favorite. The builder of our home did such an amazing job designing this kitchen. He thoughtfully made the kitchen beautiful and completely functional at the same time. I love how he incorporated cabinets into the hood. I have many of my serving pieces stored in there! Almost every square inch of the island can be used for storage as well. I didn't design this kitchen, and it is quite a bit different from what I planned on designing for the home we almost built, but I have to tell you...I could not be happier with it. We have already entertained some friends and family in our new kitchen and enjoyed ourselves thoroughly!


What are some of the must have elements of your dream kitchen?