Image Map
Showing posts with label Book Shelves. Show all posts

Sunday, November 22, 2015

6 Tips for Beautifully Styled Shelves/Shelving Decor Round Up

If you follow me on Instagram, then you know that last week I appeared on Studio 5, a local lifestyle program which airs on our NBC affiliate, KSL 5. When the producer of the show contacted me, she asked me if I would be willing to share my tips for styling bookcases like a pro. I, of course, said "YES!". I have to admit, I was a nervous wreck leading up to the taping of the show. I have never loved being in front of the camera, and the thought of thousands of people watching me was terrifying! I am happy to report that it went pretty well. I still can't watch the segment without cringing a little, but I don't know if I'll ever be fully confidant in my abilities in front of the camera.

I want to give a huge shout out to Brooke Walker, the host of Studio 5, and the entire team at KSL and Studio 5. They were incredibly helpful, gracious and encouraging. They put my nerves at ease and made me feel so comfortable. Thank you to you all! It was so nice meeting you. I had so much fun on set!

Since the show only airs here in Utah, I have included the clip of my segment below.


To recap, here are my 6 Tips for Beautifully Styled Shelves:

1. Break up the Placement of Books - Place your books both vertically and horizontally throughout your shelving, to break up lines. You can also color coordinate your books to maintain a cohesive look or turn bindings inward to create a neutral palette.

2. Use Decorative Objects - Use decorative objects to create interest in your shelving landscape. Decorative objects can be anything from vases to boxes, sculptures to bookends and beyond. Again, choose a color palette for the pieces that works with the decor of the room the shelving is in.

3. Incorporate Personal Items - You want your space to feel like it belongs to you! Fill your bookshelves with items that have meaning, weather they be pictures of your family or pieces you have collected in your travels. Adding a little piece of you to your shelves will make them that much more beautiful!

4. Use Natural Elements - Bring the outdoors in with potted plants and flowers, or add some driftwood or geodes to your shelves. These natural elements enhance the landscape of your shelving by providing a piece of nature's beauty to look at.

5. Use Art - Placing pieces of art in your shelves is a great way to create a focal point. You can place the art inside the shelving or mount it on the face frame of the shelving.

6. Give your Shelves a Pop - Use paint or wallpaper to back your shelves and really make them stand out. You can go with a soft, subtle solid hue, with a dark, moody color or with a bright color and graphic pattern. Either way, using this tip will help your shelving truly shine!

I hope you have found the tips above helpful! To get you started on the road to beautiful, Pinterest worthy shelving, I have curated 16 Home Decor Items for Beautifully Styled Shelves. Oh, and since the Holidays are upon us, I'll mention that the items below also make fantastic gifts for the Home Decor Enthusiast in your life. :)


Click the corresponding number below for item source information.

1 / 2 / 3 / 4 / 5 / 6 / 7 / 8 / 9 / 10 / 11 / 12 / 13 / 14 / 15 / 16

Happy shelf styling, friends! 


Tuesday, April 21, 2015

Sita Montgomery Interiors: My Home Office Makeover Reveal

Hello Everyone! I am over the moon excited to reveal my new Home Office to you today. I have always had a vision for my home office, but when we moved into our new construction home, the expenses associated with putting in a yard, among other things, kept me from being able to execute exactly what I wanted in the space. Instead, I decided to create a Budget Friendly Home Office, that I knew would pacify me until we were ready to make the investment in my office space, that was necessary to bring my vision to life. Almost 3 years later, the office that has long lived in my mind, has become a reality. I can honestly say that it was well worth the wait! My home office came together more beautifully than I could have ever imagined. It is a true representation of me and my design aesthetic. I am so grateful to my husband who allowed me to take this room and make it my own. He uses the office too sometimes, but he knows I work from home and wanted me to have a space that inspires me and helps me create. This office does just that.  Now, get ready for some major picture overload! Enjoy!


We took down the board and batten that was previously on the back wall and wallpapered it with a gorgeous aqua metallic sisal wallpaper. 

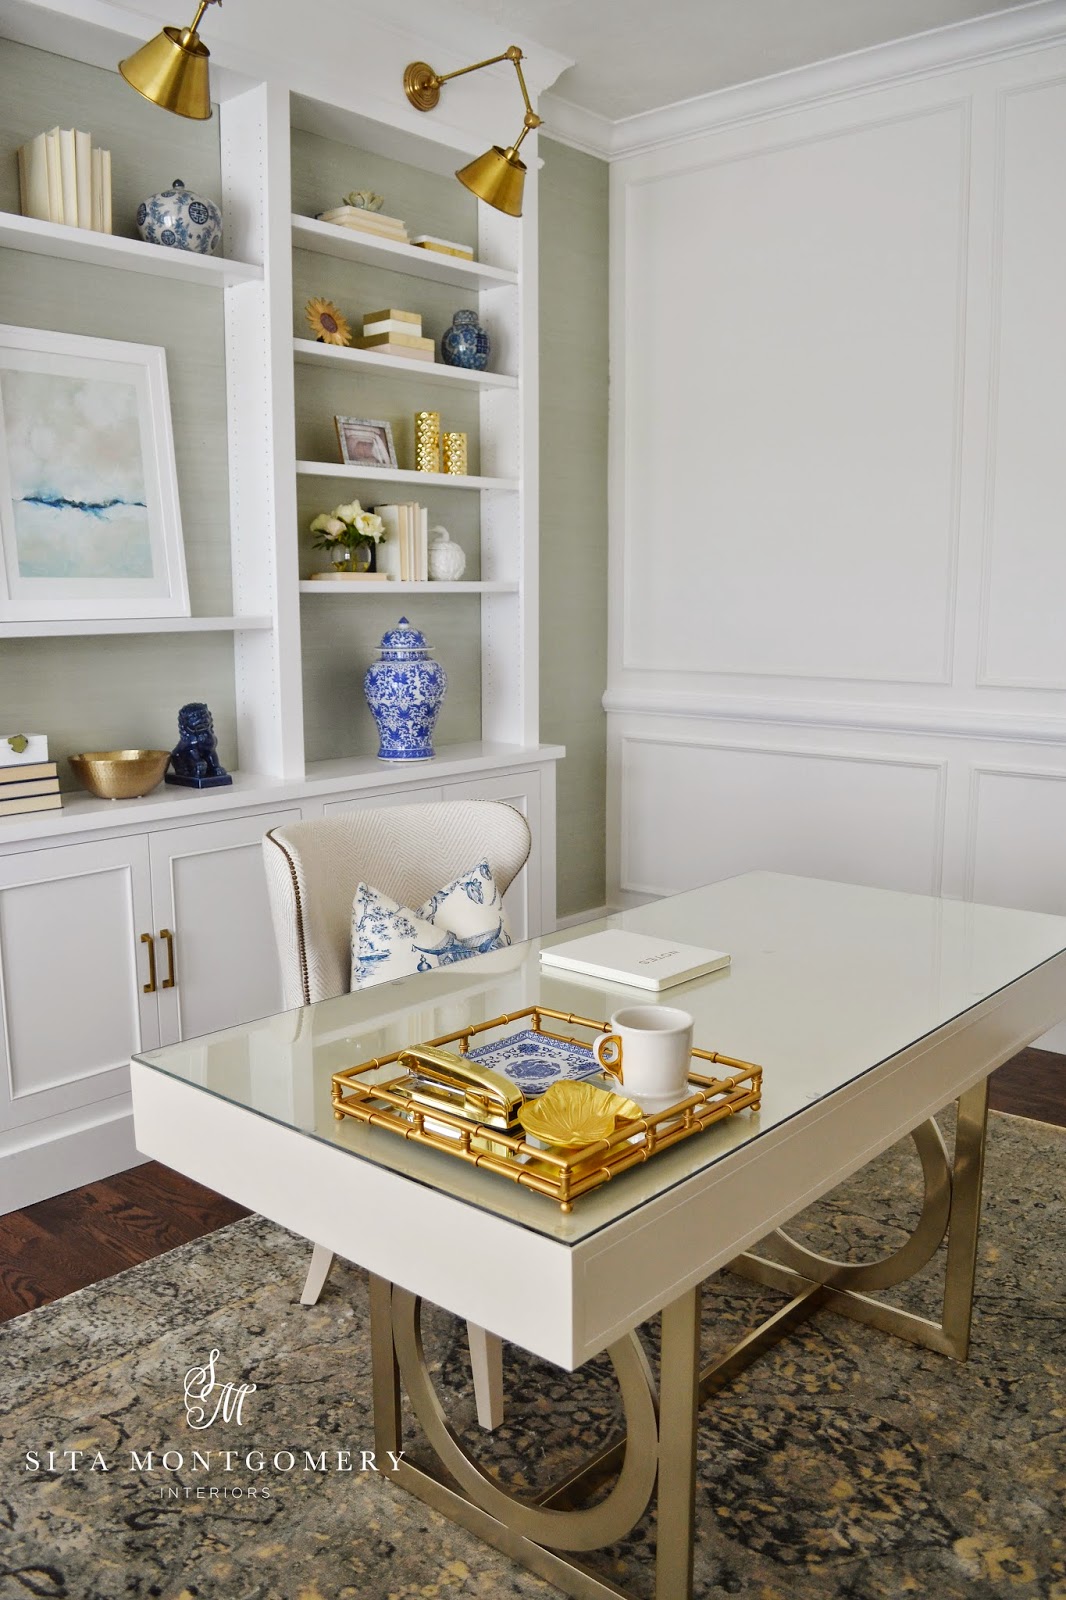
My finish carpenter built these gorgeous custom built in cabinets and shelving. Brass sconces and door hardware are the crowning jewels on them.

These gorgeous Blue and White Ginger Jars are from the fabulous online retailer Kathy Kuo Home and were a major source of inspiration for the room.

The three remaining walls were given a gorgeous trim treatment and a fresh coat of white paint.

New custom drapery dresses up the bay window.


Loving this perfect blue and white chinoiserie pillow from Society Social.

A new desk and chair were also purchased. I added a glass piece to the top of the desk to protect it and keep it in pristine condition. The new desk is also much larger and is not only a better scale for the room, but it also gives me much more room surface area to work on.

I kept one of the office chairs and added a pretty pillow and placed my favorite floor lamp from Ballard Designs next to it. The amazing hourglass brass accent table from Kathy Kuo Home has a horn top and adds depth and richness to the space. It is spectacular in person!

Shelves were styled with blue and white pieces, gold accents and the perfect piece of art from Minted.

The gorgeous rug from Loloi Rugs grounds the space and brings the whole color palette together.

I hope you love my new Home Office as much as I do! 

Sources: 


Sunday, August 24, 2014

Client Project Reveal - Midlake Basement Project - Colorful & Family Friendly Design

Hello, Lovely Readers! Today I'm back with another local client project reveal. I have had the opportunity to design a few rooms in this home. You can see my previous work in this home here and here. This time, my clients asked me to help them with the design of their basement. They wanted to transform their basement into a multifunctional space. Here is a breakdown of the wishes they had for their basement.
 
1. It needed to be multifunctional. An area where not only their kids and their friends could hang out and play, but also a space that the family could get together to watch movies and entertain other family members and friends.
2. It needed to be comfortable and colorful. This family loves color and they wanted a bright cheerful space. No neutral color pallet for them!  

3. The furnishings needed to be extremely kid friendly. The children in this family range in age from tween to toddler. Everything in the room needed to be able to withstand the abuse it is sure to receive at the hands of the kids and their friends.

I could handle that! I got to work and came up with a plan. Here is what the space looked like before...

BEFORE


AND NOW...
 
I started by giving the entire basement a fresh coat of paint. The newly made over fireplace and built-ins are now the focal point in the space. V-groove paneling was added to the wall with the new theater screen, and painted white to add interest to the large wall and help lighten the room.


I had the backs of the new built in bookcases wallpapered with Schumacher's Imperial Trellis wallpaper. I adore this pattern. It is a classic in my book.


These leather storage ottomans are super kid friendly and functional. The top of each ottoman is quartered and flips over into a tray. Perfect for entertaining multiple guests.
 
Lots of throw pillows add pattern, texture and color to the large, durable sectional.


We also added a wet bar area to the basement. It's perfect for popping popcorn and storing cold drinks!


Another look at this newly finished space.


My clients are thrilled with the way the basement came together. I think all of their requests were successfully fulfilled. They told me that they have already spent numerous hours in their new space and are enjoying every minute. It has been a joy to work with these wonderful clients. I am so thankful to them for the trust and faith they put in me to design the spaces in their home. I really do love my job!


Monday, October 8, 2012

Quick Change...Framed Paper and a Peak at my New Basement

One of the things our new home had no shortage of is built in shelving. It was one of the things that I loved so much about this home the first time I saw it. Lately, I have been trying to fill and style the shelving surrounding our basement fireplace. The shelving is a gorgeous bright white. While I absolutely adore the clean and fresh look of it, I wanted to infuse the shelving with a bit of color. I love the idea of framing beautiful paper and using it as artwork. When I found this paper on Paper Mojo, I knew it would be perfect.


I cut the paper to fit into the white 12 x 12 frames I bought at a local craft store and added them to the shelves.

 Here is a little peak of our basement fireplace and surrounding shelving. I am still working to get it all accessorized, but I am happy with the progress I have made so far. Also, you may notice that I have re-used most of the decor from the family room in my last home, here. 
 The ceilings in our new basement are 12 feet in height and it is completely day-lit. When we walked downstairs for the first time, we gasped, and then my husband said, "This is our house." All three of the kids bedrooms are in the basement, and we loved that it felt like another family room for them to hang out and play in. More of the basement to come...soon, I promise.

Monday, July 16, 2012

Ikea Ribba Picture Ledge turned Book Shelf

Hello Everyone! I hope you all had a great weekend. We are still enjoying our summer in full swing! I apologize for only doing one post last week, but my best friend and her kids have been in town from Virginia and we have been spending every minute we can with them before they head back.

I did manage to find the time to complete one project on my list (with the help of my hubby). One thing there is no shortage of in our new home is large, blank, gray walls, like this one in my little man's room...


While I knew that I wanted to fill this wall with something fun and colorful, I also knew that I wanted it to be functional. My son has the smallest bedroom in the house and every square inch needs to count. I've had this image saved in my inspiration file for quite sometime and I knew that a book wall was exactly what my little guy's room needed.


So I headed down to my local Ikea to and picked up 6 of these 45" Ribba Picture Ledges.

I then put my husband to work installing them in our Son's room. Here is what that blank gray wall looks like now...


 I also decided to add some photographs and digital art prints along with the books to the shelves.


A little sneak peak of the stripes on the adjacent wall...


For $90.00 I was able to fill up and entire wall, while also creating a fun place for my son to store his books. I will rotate the books on the bottom shelf, since he can't reach the middle or top shelves yet. 

BTW, can you tell what colors we are using in his room? I'll be posting more pictures of his room soon!


* Linking to Home Stories A 2 Z Tutorials and Tips